Ordering a Guest Meal
You can order a meal for a patron's guest. The ticket for the meal can be printed immediately or scheduled for delivery with the patron's meal.
To order a guest meal:
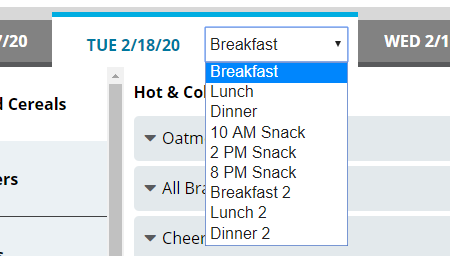
- On the record for the patron with the guest, select the date for which you want to order a guest meal.
- In the list, select the appropriate meal.
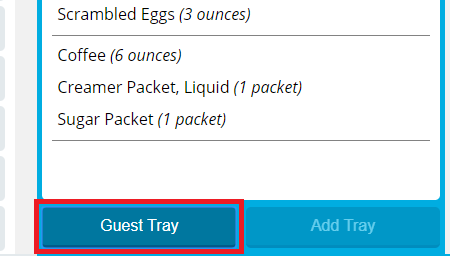
- Under the Selected Items list, click Guest Tray. The Guest Tray dialog appears.
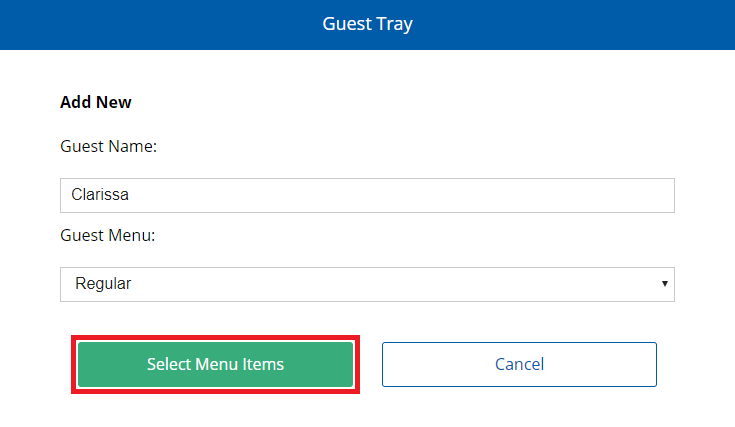
- If you want to specify a name for the patron's guest, in the Guest Name box, enter a name for the guest.
- In the Guest Menu list, select the menu from which the guest will order.
- Click Select Menu Items.
- To add a menu item to the guest's meal:
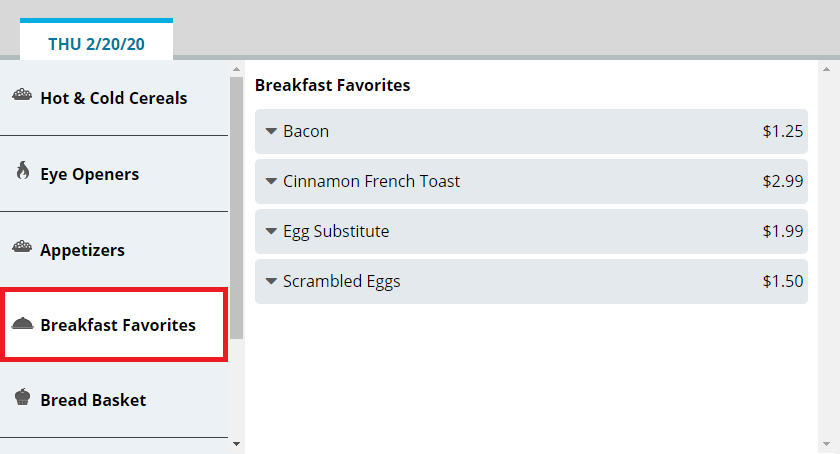
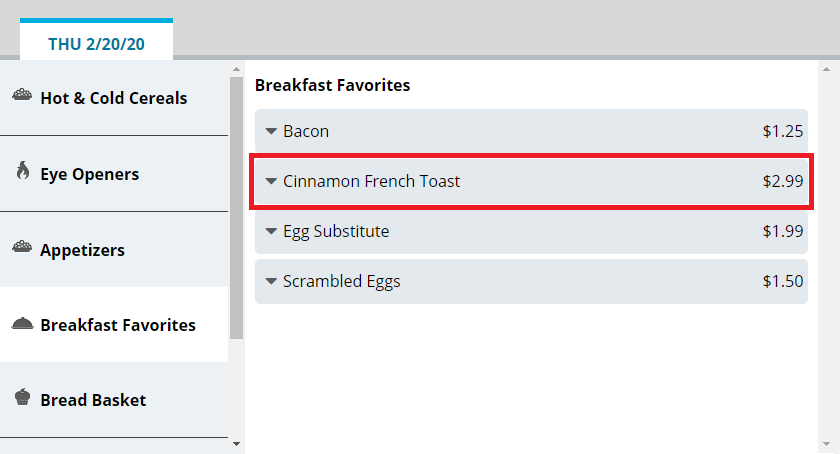
- On the left menu, select the category (publishing group) for which you want to view menu items.
- In the center section, select the menu item you want to add.
- If you want to increase of reduce the portion size to order, continue as follows:
- If you want to increase the portion size of the item, click
 .
. - If you want to reduce the portion size of the item, click
 .
.
- If you want to increase the portion size of the item, click
- Manage the selection as needed:
 To add a note for the selection
- Click
 to expand the menu item.
 - Click Notes.
- In the Notes box, enter the note you want to add.
- Click Save.
To view nutrients for the selection- Click to expand the menu item.
- Click View Nutrients. The option expands to display nutrient information for the menu item.
To remove the selection- Click to expand the menu item.
- Click Remove Item. The selection is immediately removed from the Selected Items list.
- Click
 Note: While the Selling Price for menu items in a guest meal is displayed in the application, you cannot charge the guest directly for their selections through Bedside Connect / Room Service Connect.
 - To add a menu item not on the menu to the guest's meal:
- On the left menu, click Request Items.
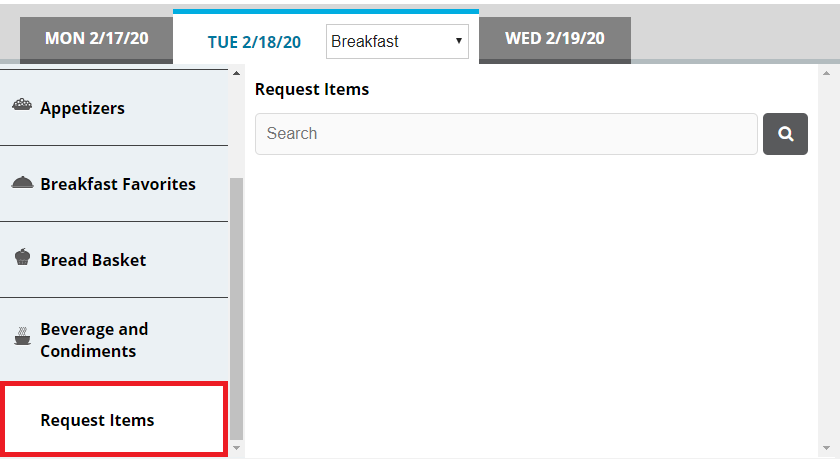
- In the search box, enter a keyword for the item for which you want to search.
- Click
 . You can also press Enter. The search results appear.
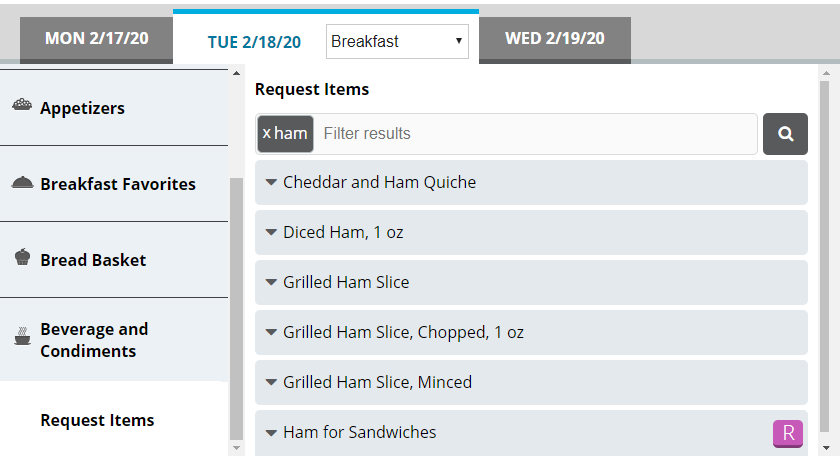
- If you want to filter the displayed search results, in the search box, enter an additional keyword with which to filter. The results filter as you type.
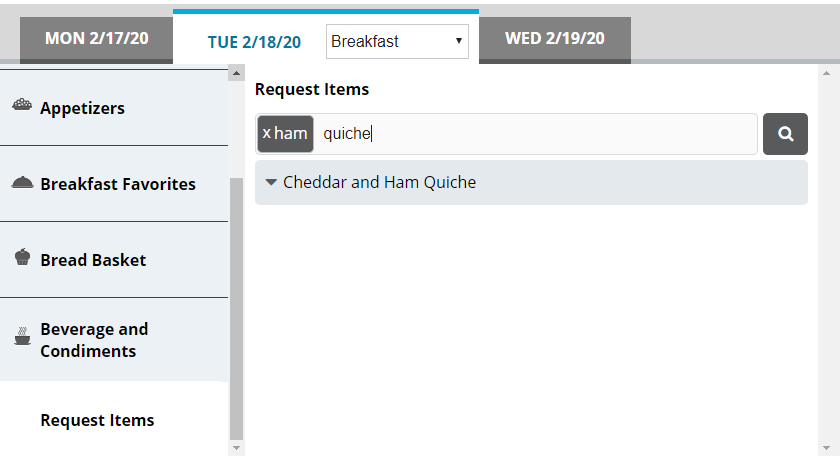
- From the results, select the request item you want to order. The item is added to the Selected Items list.
- On the left menu, click Request Items.
- Repeat steps 7–8 until all menu items you want to order have been added to the Selected Items list.
- If you want to add a note to the meal, continue as follows:
- In the top-right corner of the Selected Items list, click the add note icon. The Meal Notes dialog appears.
- In the box, enter the note you want to add for the meal.
- Click Save.
Tip: When a meal has a note added to it, a checkmark icon appears on the add note icon.
- In the top-right corner of the Selected Items list, click the add note icon. The Meal Notes dialog appears.
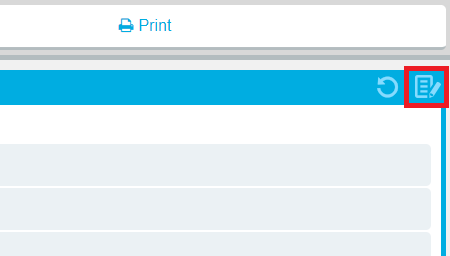
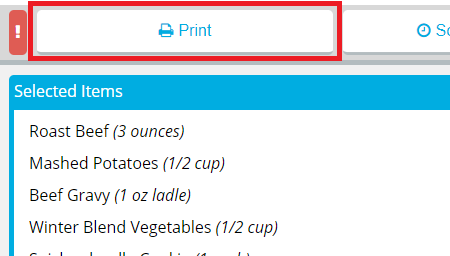
- When you are done making selections, order the meal as follows:To print a ticket immediatelyTo send a rush ticket
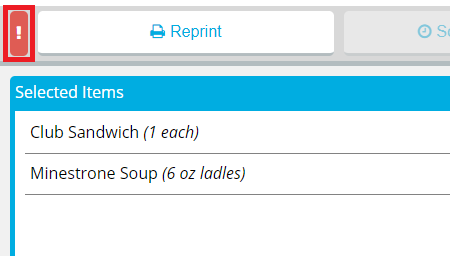
- If a ticket has already been printed for the meal, the Reprint Ticket dialog appears. Continue as follows:
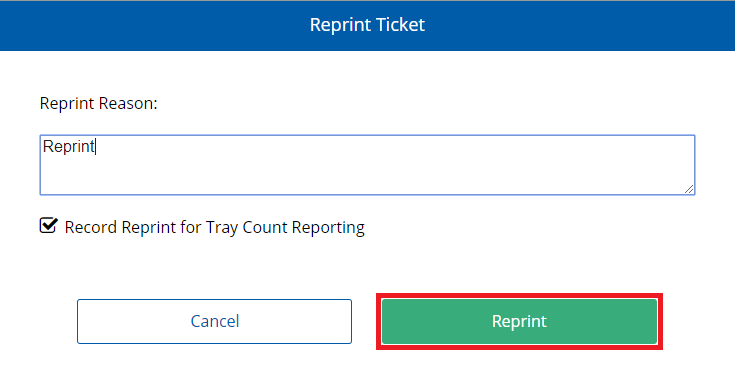
- In the Reprint Reason box, enter a reason for why the ticket was reprinted.
- If you do not want the reprint to be recorded in tray count reports, click to clear Record Reprint for Tray Count Reporting.
- Click Reprint.
If a ticket has not yet been printed for the meal, it will be printed immediately.
To reprint a ticket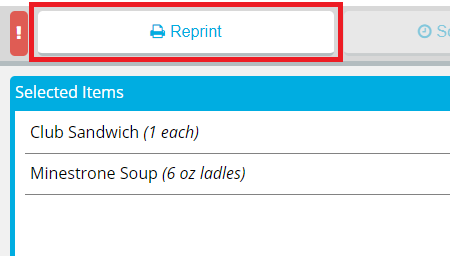
- In the Reprint Reason box, enter a reason for why the ticket was reprinted.
- If you do not want the reprint to be recorded in tray count reports, click to clear Record Reprint for Tray Count Reporting.
- Click Reprint.
A guest record appears displaying the menu for the specific date and time selected in steps 1–2.
Note: You cannot schedule a guest meal at a later time by itself. A guest meal will use the scheduled delivery time set for the patron's meal.