Inventorying Items in a Worksheet
To conduct an inventory for items in an open worksheet:
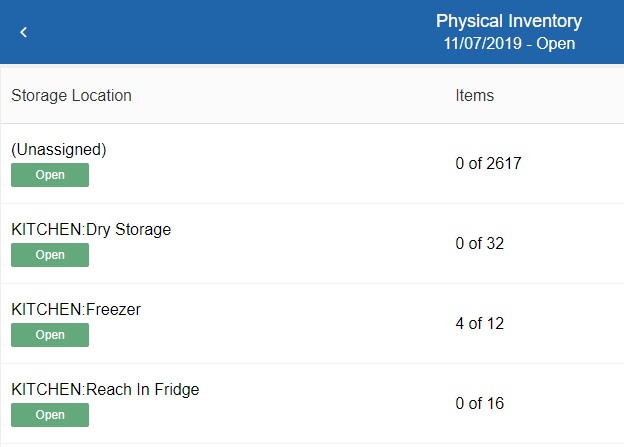
- On the Inventory List page, click the Open inventory in which you want to complete a worksheet. The Physical Inventory page for that inventory opens.

- Select the open worksheet you want to complete. The storage location page opens.
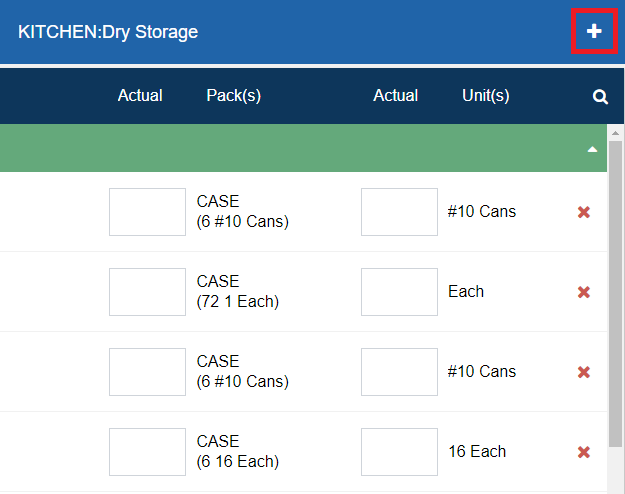
- As you conduct the inventory, for each item row, continue as follows:
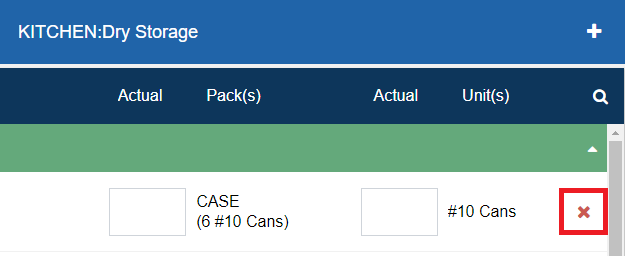
- In the Actual box for Pack(s), enter the number of packs of the item in inventory.
- In the Actual box for Unit(s), enter the number of units of the item in inventory.
- If you want to add or delete items in the worksheet, continue as follows:
 To add an item to the worksheet
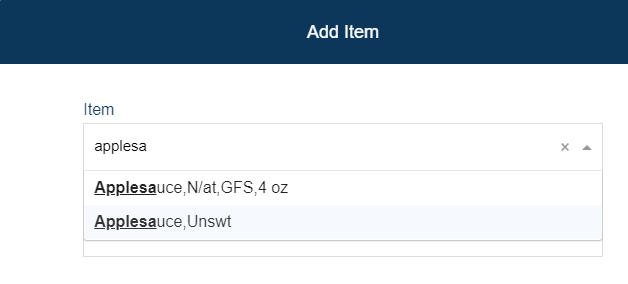
- In the top-right corner, click . The Add Item dialog appears.
- In the Item list, enter keyword(s) to search for the item you want to add. After entering three characters, a list displays search results based on the keyword(s) you enter.
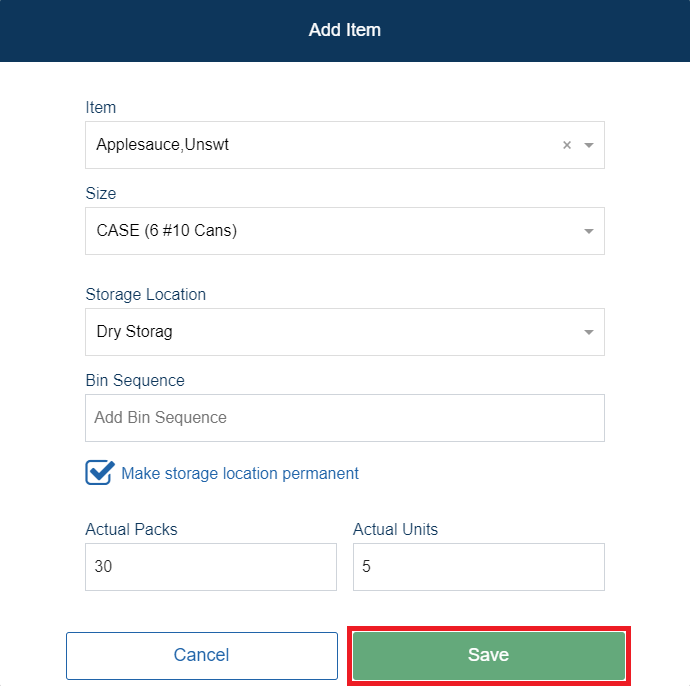
- In the list, select the item you want to add. The Size list automatically fills with the default package size for the item.
- If you want to change the package size, in the Size list, select the appropriate package size.
- In the Storage Location list, select the storage location of the item.
- If the item is in a specific bin sequence, in the Bin Sequence box, enter the bin sequence.
- If you want to set the storage location as a permanent location for the item, click to select Make storage location permanent.
- In the Actual Packs box, enter the number of packs of the item in inventory.
- In the Actual Units box, enter the number of units of the item in inventory.
- Click Save.
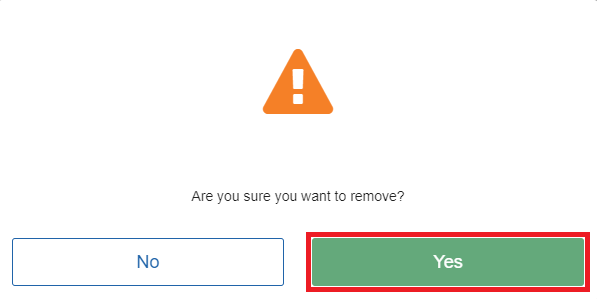
To delete an item from the worksheet- For the item row you want to delete, click . A confirmation message appears.
- Click Yes.
- In the top-right corner, click . The Add Item dialog appears.
- Repeat steps 3–4 until you have inventoried all the items needed in the worksheet.
- When you are done inventorying items in the worksheet, click Save.
Note: The Items column displays the number of items that have been accounted for in the worksheet. You can use this value to see which worksheets still need to be completed.
Caution: Starting in version 2.3.3, if you are disconnected at any time from the network and the application cannot reach the database, a warning will appear at the top of the page or above the current selected item indicating the amount of time remaining before your session times out and work is lost. To ensure that no work is lost, return to a connected area before the remaining time elapses.